How do I activate Schoology for my organization?

For administrators with LMS integrations, a premium feature through Remind Hub! To learn more, please contact your Remind account manager or Remind support.
In order for your teachers and staff members to have access to Schoology, you must first follow the instructions below to enable the feature from your administrator dashboard and within Schoology. Once you have activated Schoology for your community, you can provide them with this resource which will show them how to configure their Schoology account.
Setting up Schoology Part 1
From your Remind administrator dashboard in Remind*:
- Click on the Settings tab.
- Select App integrations from the navigation menu on the left.
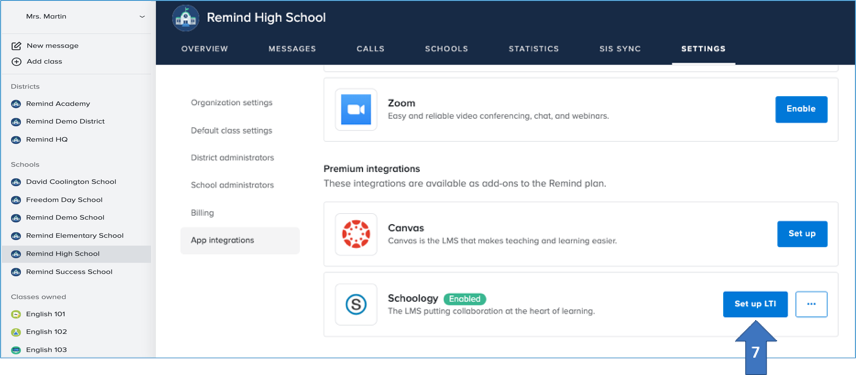
- Click Set up for Schoology.

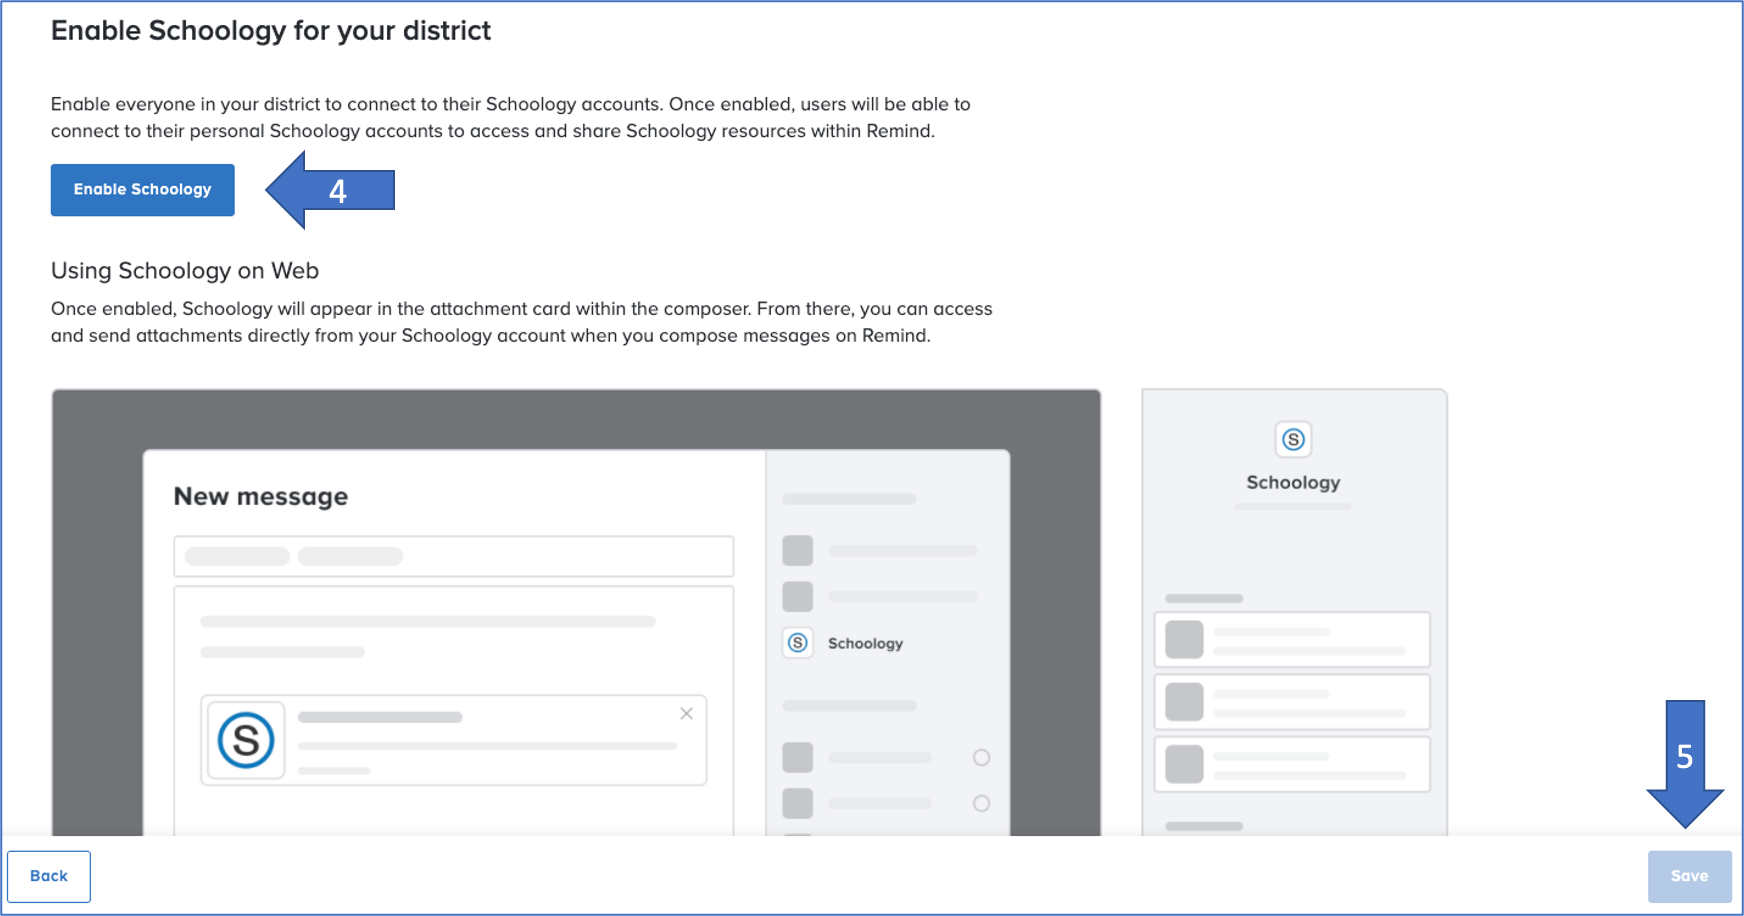
- Click Enable Schoology.
- Click on the Save button located on the bottom right side of the screen.
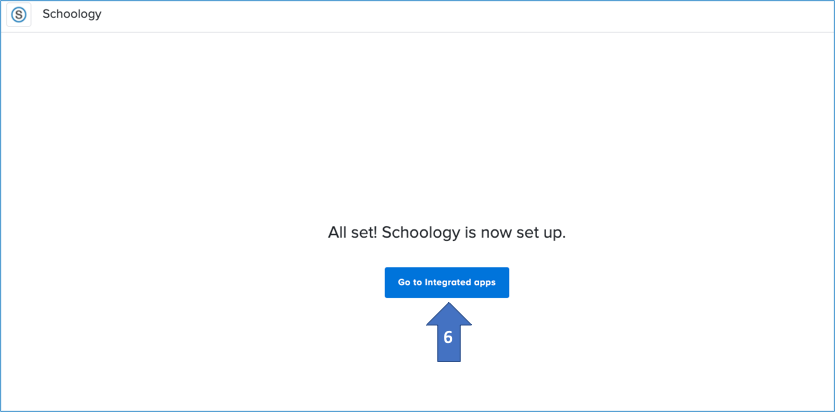
- Now click on Go to Integrated apps.
- Click Set up LTI. Congratulations, you have completed the first part of setting up Schoology!
- Keep the Schoology LTI configuration page in Remind open on your computer, and move forward with the instructions below.


Setting up Schoology Part 2
- Open Schoology in a new tab.
- Log in to your Schoology account.
- Click Tools and select School Management from the dropdown menu.
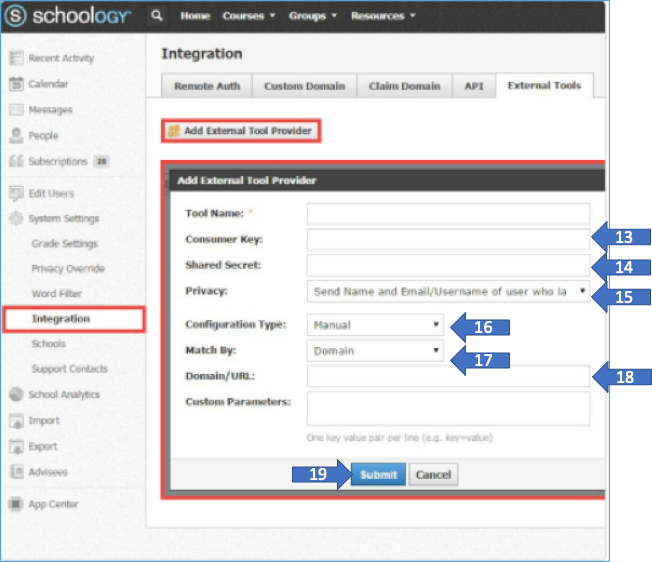
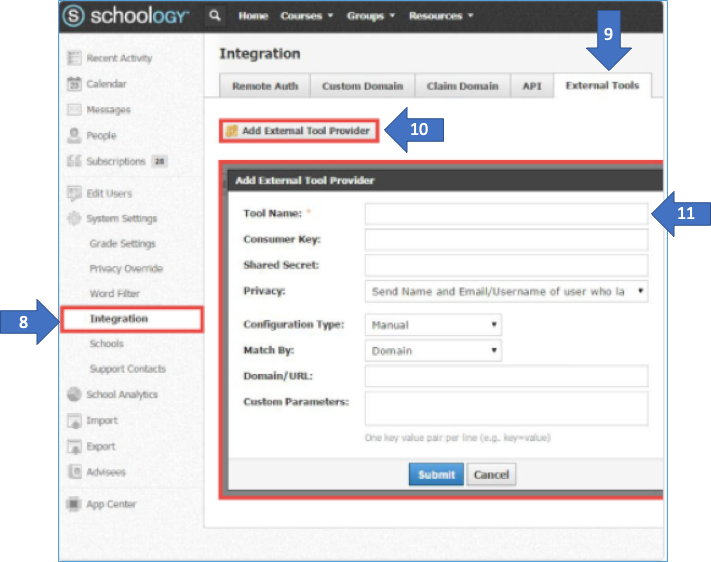
- Click on Integration which is located on the navigation menu on the left.
- Select the External Tools tab at the top right side of the screen.
- Click Add External Tool Provider.
- Enter Remind in the Tool Name field.

- Navigate back to the first tab that has the Schoology LTI configuration page open in Remind.
- Click Generate Credentials to generate a Consumer Key and a Shared Secret (step 7).

- Go back to Schoology, and enter the Consumer Key and Shared Secret into their respective fields.
- Set the Privacy to Send Name and Email/Username of user who launches the tool.
- Set Configuration Type to Manual.
- Set Match By to Domain.
- Enter the Config XML generate credential to generate URL in to the Domain / URL field.
- Click Submit.

Congratulations, you have activated Schoology for your organization!
Inform your staff
Your teachers must now complete the LTI configuration process in their own Remind account. Until they do, they will not be able to access the Remind composer from Schoology.
To make sure all the staff members in your organization set up their Schoology LMS integration, we recommend sending them a districtwide message on Remind with this helpful instruction for configuring their account for Schoology.
*Tip: If you can only use Google Chrome to access Schoology, copy and paste the following links in to separate windows, and switch the Default setting for the SameSite cookies to Disabled: chrome://flags/#same-site-by-default-cookies and chrome://flags/#cookies-without-same-site-must-be-secure. Then log out and back in to your Remind account, and proceed with the steps above to configure your Schoology account.
